


Foundation and Floor

The video outlines what needed to be done to shore up the foundation.
The first step was to excavate and level the house. No magic, just a spirit level, physical work, a shovel, wheelbarrow and a jack. Tree roots were a challenge. The cabin is on a well drained elevated granite shelf.
The next steps are to build a form with the available material around the exterior perimeter to keep the concrete from flowing out when the mixer truck arrives.
5/8” holes are bored through the wall plates every 3’. 1/2” x 8” threaded rods with washers and bolts at the top and bottom ends were dropped through as anchors . A heavy plastic was used as a moisture barrier between the wall plate and concrete slab to keep ground moisture away from the wood.
Two cubic yards of 3/4” clear aggregate was added and compacted as a sub-base. The north east corner was already a slab of bedrock. The concrete used for the slab is fibre reinforced, ordered locally. The main thing is to have the concrete pushed under the wall plates.
Levelling the poured concrete required more skill than I had and using a rented a bull requires a certain amount of prior training, I had marginal success. The slab surface was uneven up to 3/4” in some areas and I had topped up the surface later.
Next step is making an insulated floor structure over the slab after it set. A grid of 1″x1″ wood was secured to the concrete using tap con screws. The grid squares are 2’x2’ with 1” foam board set inside the squares set against the concrete. The cover of the grid is 5/8″(15mm) plywood.
The floor is 440sq ft of vinyl plank using contact adhesive to the plywood. A great choice recommend by the proprietor of the Casa Blanca Cottage Estate
Insulation
The first step after the complete gut of the old rodent infested pink fiberglass insulation and pouring of the concrete slab floor was insulation. The concrete floor has one inch of pink foam board. R5. I laid a grid of 1″x1″ wood and set the foam board inside against the concrete. Then cover the grid with 5/8″(15mm) plywood.
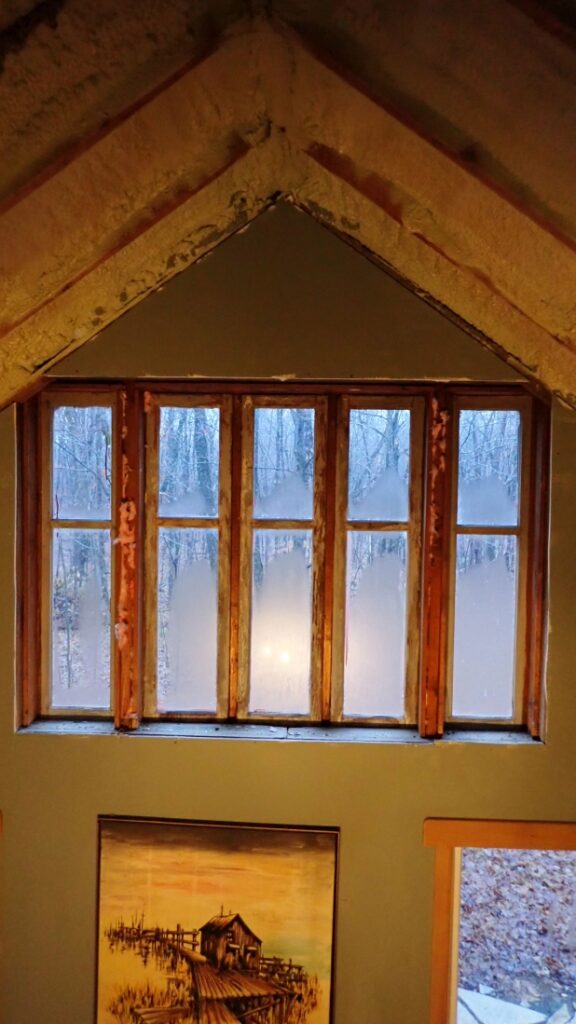
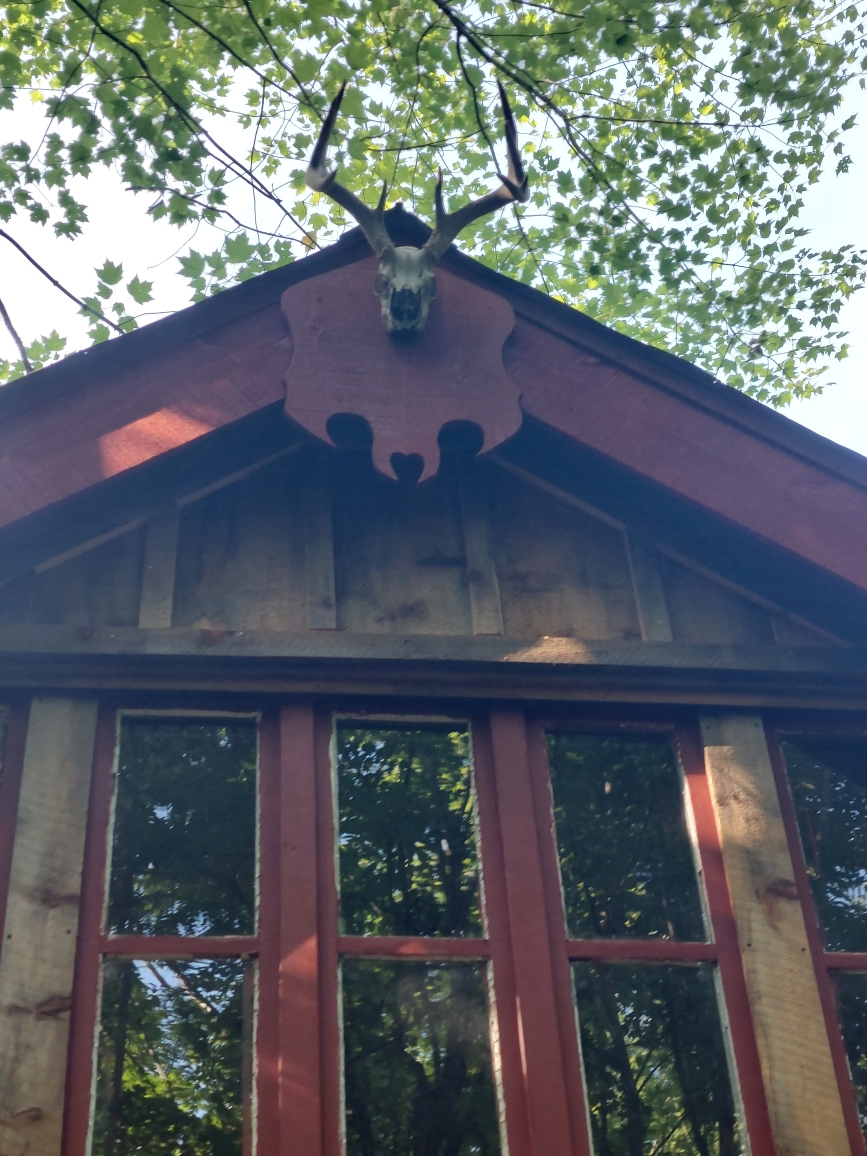
The house frame is made from 2’x6’ hemlock actual size. This presented a few minor issues in construction due to the nominal dimensions of retail lumber. The ceiling rafter, same. 10 ½ – 12 roof pitch. With a 1’ horizontal strapping covered with metal roof. The roof surface area is 660 sq ft and needed a base restoration that consisted of a wire brush by hand and base coat of grey primer and a coat of Hunter Green. The paint and primer is Sher-Cyl by Sherwin Williams. Removal of the chimney and apply a patch.
The insulation is 5 ½” medium density closed cell spray foam from Comfort Zone Insulation Perth. To prevent the foam from being applied directly over the strapping and onto the ceiling interior I covered the interior surface of the strapping with 1’ pink insulation board. Note: I have yet to complete the interior covering of 3” x 9/16” T&G pine from the local Home Hardware Perth https://finescaletech.com/resources/.

There is a 2” crack that formed between 2 rafters. I will seal this up with a can of spray foam. I can see that mice are using the space between the furring strips and roof metal and a heat loss there. An easy fix due to environmental and physical condition of the structure. Spray foam was the way to go.
Thank You Comfortzone Insulation, Perth Ontario
Plumbing
 The Outhouse officially known as the Class 1 Earth Pit Privy. A link to the Tay Valley specs PDF: OBC-building-guidelines—Class-1—privy
First step was moving the old outhouse. A family member constructed a new building. They also had a B series Kubota B Series tractor with shovel and bucket. A 5’x5’x6’ hole was excavated. There were enough 2 ½ x6” timbers to construct the structure for the outhouse building to sit on and ample structure to keep the earth walls from collapsing in.
Potable water is Ottawa City tap brought in by hand in 20 litre containers as needed,
Rain water is captured off the metal roof into the eaves trough and collected in two 45 gallon drums and additionally a 1000 Liter tote. The pipes are ¾” Pex. Interior pipes to the kitchen sink are CPVC. They must be drained in fall and taps left open. The drain is a 4” 90 degree elbow I had lodged placed prior to the concrete floor being poured. From the sink to the pipe is standard 1 ½” abs and from exterior to a grey water pit is a 25 ft run of 4” Big O tube officially known as high-density polyethylene (HDPE) tubing. The pit is 30’x5’x30” and lined with rocks and back filled with 1” clear aggregate. The cover is pressure treated lumber. A little deck.
Hot water There is hot pressurized water rigged up through a Camplux 8L Propane Outdoor Tankless Water Heater fueled by a regular BBQ propane.
The water is powered by a Seaflo 55 Series 12V DC water pump. That unit has an internal pressure switch. The pump is 40 feet away from the power source and requires a 10AWG + and – wire sealed in conduit.
Frost is an issue and the pipes and equipment must be drained in spring and fall.
Heating
 The Cabin is heated by a Norwegian made Jotul Alagash 300.
The fuel is supplied by two rented 120 gallon propane tanks.
The propane stove was installed by a fully licensed HVAC technician though Embers in Perth.
Note: In fall 2024 the pilot light wasn’t igniting. I believe the thermo pile and thermo couple need replacing. Seems a little premature being the stove gets light use and the pilot light is used only on weekends in spring and fall. I ordered the replacement parts from Friendly Fires Online.
The Jotul stove and its remote control keep the entire cabin very warm. There is a temperature variance from the coolest being the floor and much warmer up in the loft. With the solar system battery upgrade, I may add a ceiling fan. To be tested in the future.
Structure
 The house was originally constructed by hand circa 1984 by the late Gordon Lee. He had left many piles of wood on the property. These beams came from the late Jim McCann’s barn. Other wood from a torn down cottage he had hauled to the propert. I don’t know the origin of this octagonal maple post.
This structure holds up the loft. Loft floor is 2X6 T&G pine.
Interior/Exterior

In 2022 the basic construction was sound and the art work could begin. I would have preferred a natural stone or brick siding but the real world of budget and time constraints led me to simple board and baton. I had originally had a desired to build a log cabin. Later for that project. Rough cut 9/16 x 10 was used.
Cabinetry, finishing carpentry, door and window casings, shed, railings and a shed where completed plus an outdoor shower. 2024 had seen interlock brick and perennial gardens.
The shed was constructed from the recovered and denailed lumber from around the Estate. Each one of these projects deserves it’s own chapter.
The Buildingpermit closed despite the lack of ceiling cover over the sprayfoam. That is for 2025.
This will be 360 linear ft of 9/16×10” pine lumber and milled onsite.


Take time to learn some Electricity 101. I went in cold and bought a Bluetti AC300 Max. It was expensive and a year later made my own LifPo4 battery in order to power LED lighting, 5.1 stereo and 32”flat screen plus the water pump in year 2022. In 2023 an ICECO VL45 12V Portable cooler was added.
The battery pack was fine for a weekend but I needed to do further testing. A Honda 2200i is used for the table saw and power tools. It’s reasonably quiet and very portable. There is one circuit in the house. A second battery was added. This battery was the home made from four 3.2V cells via Amazon. Wired in series to create 12.8V at 96Ah. A fraction of the cost of the Bluetti. The Bluetti expansion batteries are prohibitively expensive.
System Ver: 1.0 2021
Single 320Watt Hanwha Solar Q PEAK DUO, Victron 100/30 MPPT, Bluetti AC300Max, bus bar and 12v panel with switches. Renogy 700 Watt pure sine wave inverter plugged into the house circuit for 115V.
System Ver1:2 2022-20223
Two Panels, added was a used Canadian made P M90 connectors and 10AWG stranded copper wireV. The two different batteries and two differing PVs created separate solar powered circuits. One PV for the Bluetti into the house circuit. The other PV circuit for the homespun battery to power the cooler and pump.
System Ver1.3 2024
Two PVs wired in series to charge the homespun battery. A Victron Smart Shunt was added to the battery and I could compare power consumption between the commercial battery vs the home spun battery. Conclusion: the homespun battery is more efficient than the commercial product that consumes its own power.
System Ver1:4 2025 Testing
A JBD Smart Bms Lifepo4 BMS 4S with Blue Tooth via Ali Express.com was added to the homespun LiFePo4 battery. It’s a backup now.

The battery and PVs will be retired and replaced with two Litime 230Ah batteries wired in parallel and charged by four Hanwha Solar Q PEAK DUO ML-G10.a+ 405 Watt, 66-cell (132 split-cell) mono PV modules. Each module of the system can be connected and disconnected by M90 male and female plugs. All wires are 10AWG copper strand. The PVs to the MPPT controller can be connected and disconnected to allow the commercial unit to be charged separately. It has an M90 plug. The MPPT controller to the batteries and the batteries to the bus bar. Will update this section to Ver 2.0 spring summer 2025.
System Ver1.5 2025 March
The home made battery and Bluetti have been replaced by a pair of Litime 230Ah LifePo4 batteries with low temp cutoff. The cut off is 5C.
The back of the house faces east south east and nestled in a high elevation mature deciduous forest. Peak sunshine through the trees is from 10:30 – 2:00 in summer. The original goal was to use the batteries over the weekend and have them recharge throughout the week. This works, but refrigeration became an issue, so I made a battery to save cost. 2023 the cooler ran all season. 2004 this wasn’t really necessary. LifPo4 battery prices have dropped, and a person couldn’t make one for less than the price of a new battery in 2025.
I’d recommend www.Solacity.com in Kemptville Ontario
This project is successful. For a three season cottage solar is the only way to go. The price for Hydro One plus the contractors to run the lines would be $10,000 as of July 2024. Plus $100/mo for the rest of my life. The cost of the solar installation is 1/3 of that price. It would be even less if I knew now what I knew in 2021.